Introduction
Since the release of stable diffusion there has been an avalanche of new techniques and tools to create AI generated art. One of the most interesting of these tools is dreambooth. This is a technique created by Google Research to personalize text to image models.
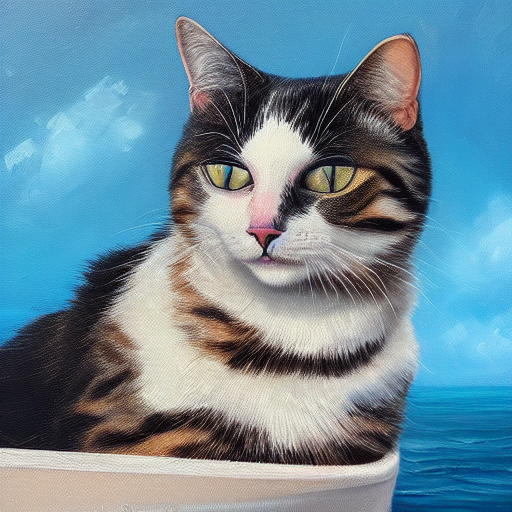
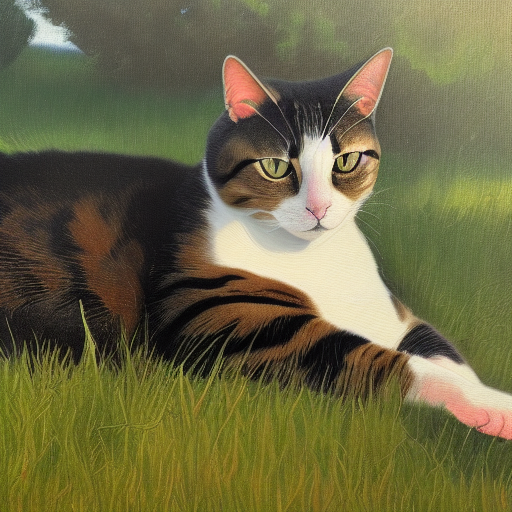
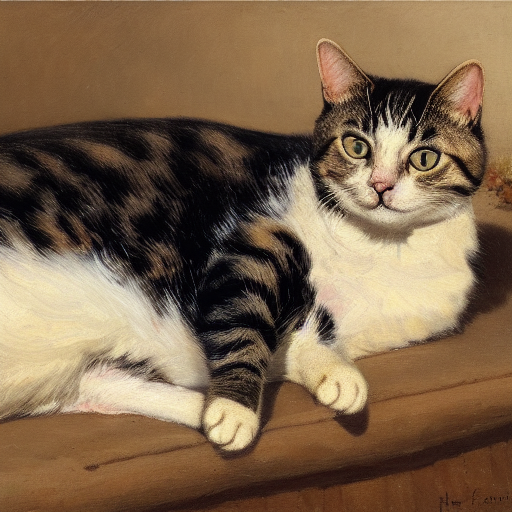
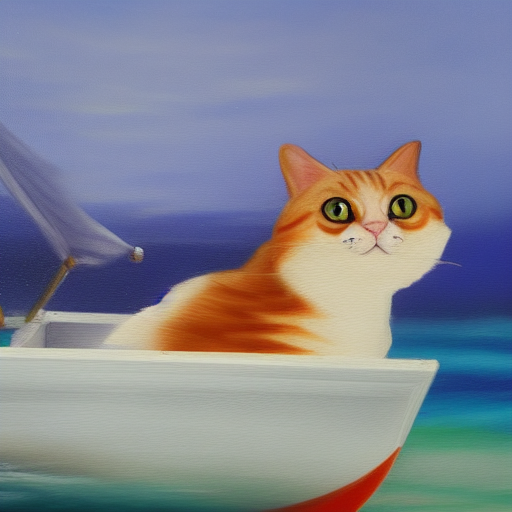
A text to image model like stable diffusion allows you to create images from a description. For example "A beautiful oil painting of a cat sailing the ocean" will probably give you something like the image below with the default stable diffusion model.
These models provide the relations between how the world looks and how it is described in text in a very compact format. If you know exactly the right text you can get the model to output almost any image you want. But the catch is that it often takes a large effort and a lot of experimenting to find the right text to use as input.
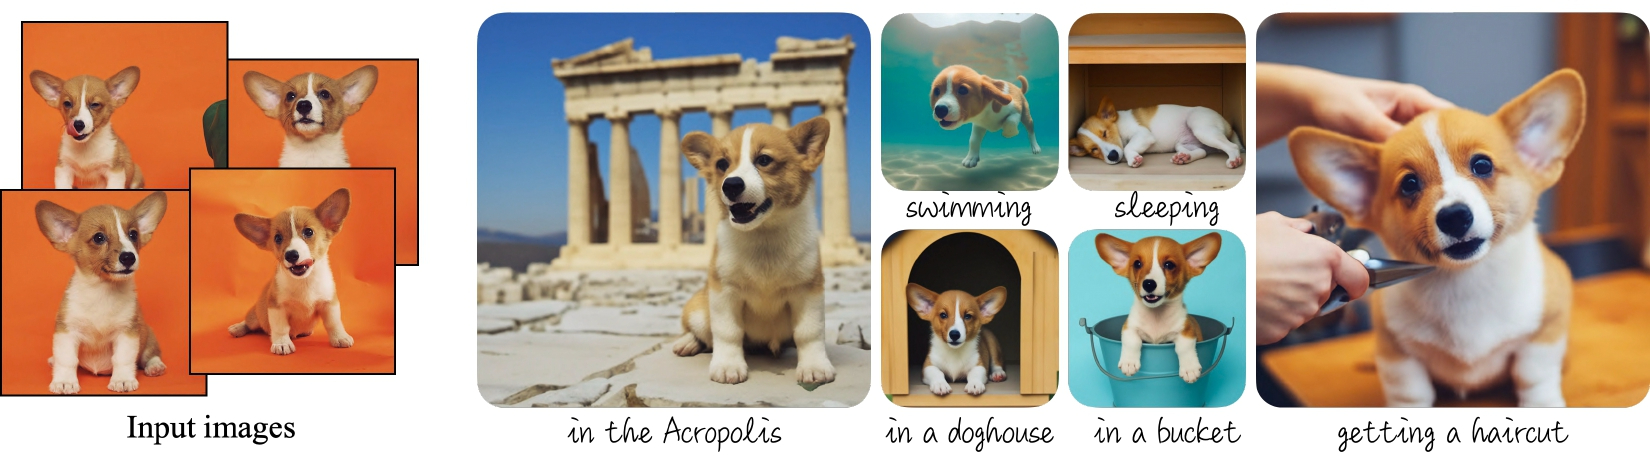
This is where Dreambooth comes in. Dreambooth allows you to teach the model your own c0ncepts. In The example below they trained the model the concept of a certain cute dog with large ears. This dog can then be placed in different contexts.
Dreambooth unlocks many possibilities. You could train a model the concept of you by feeding it selfies and place yourself in your favourite movies, you could turn your pets into Pixar characters or teach it to recognize a certain art style that you like.
Training a custom Dreambooth model
This part will be a guide for training your own Dreambooth model using the colab notebook found in https://github.com/TheLastBen/fast-stable-diffusion
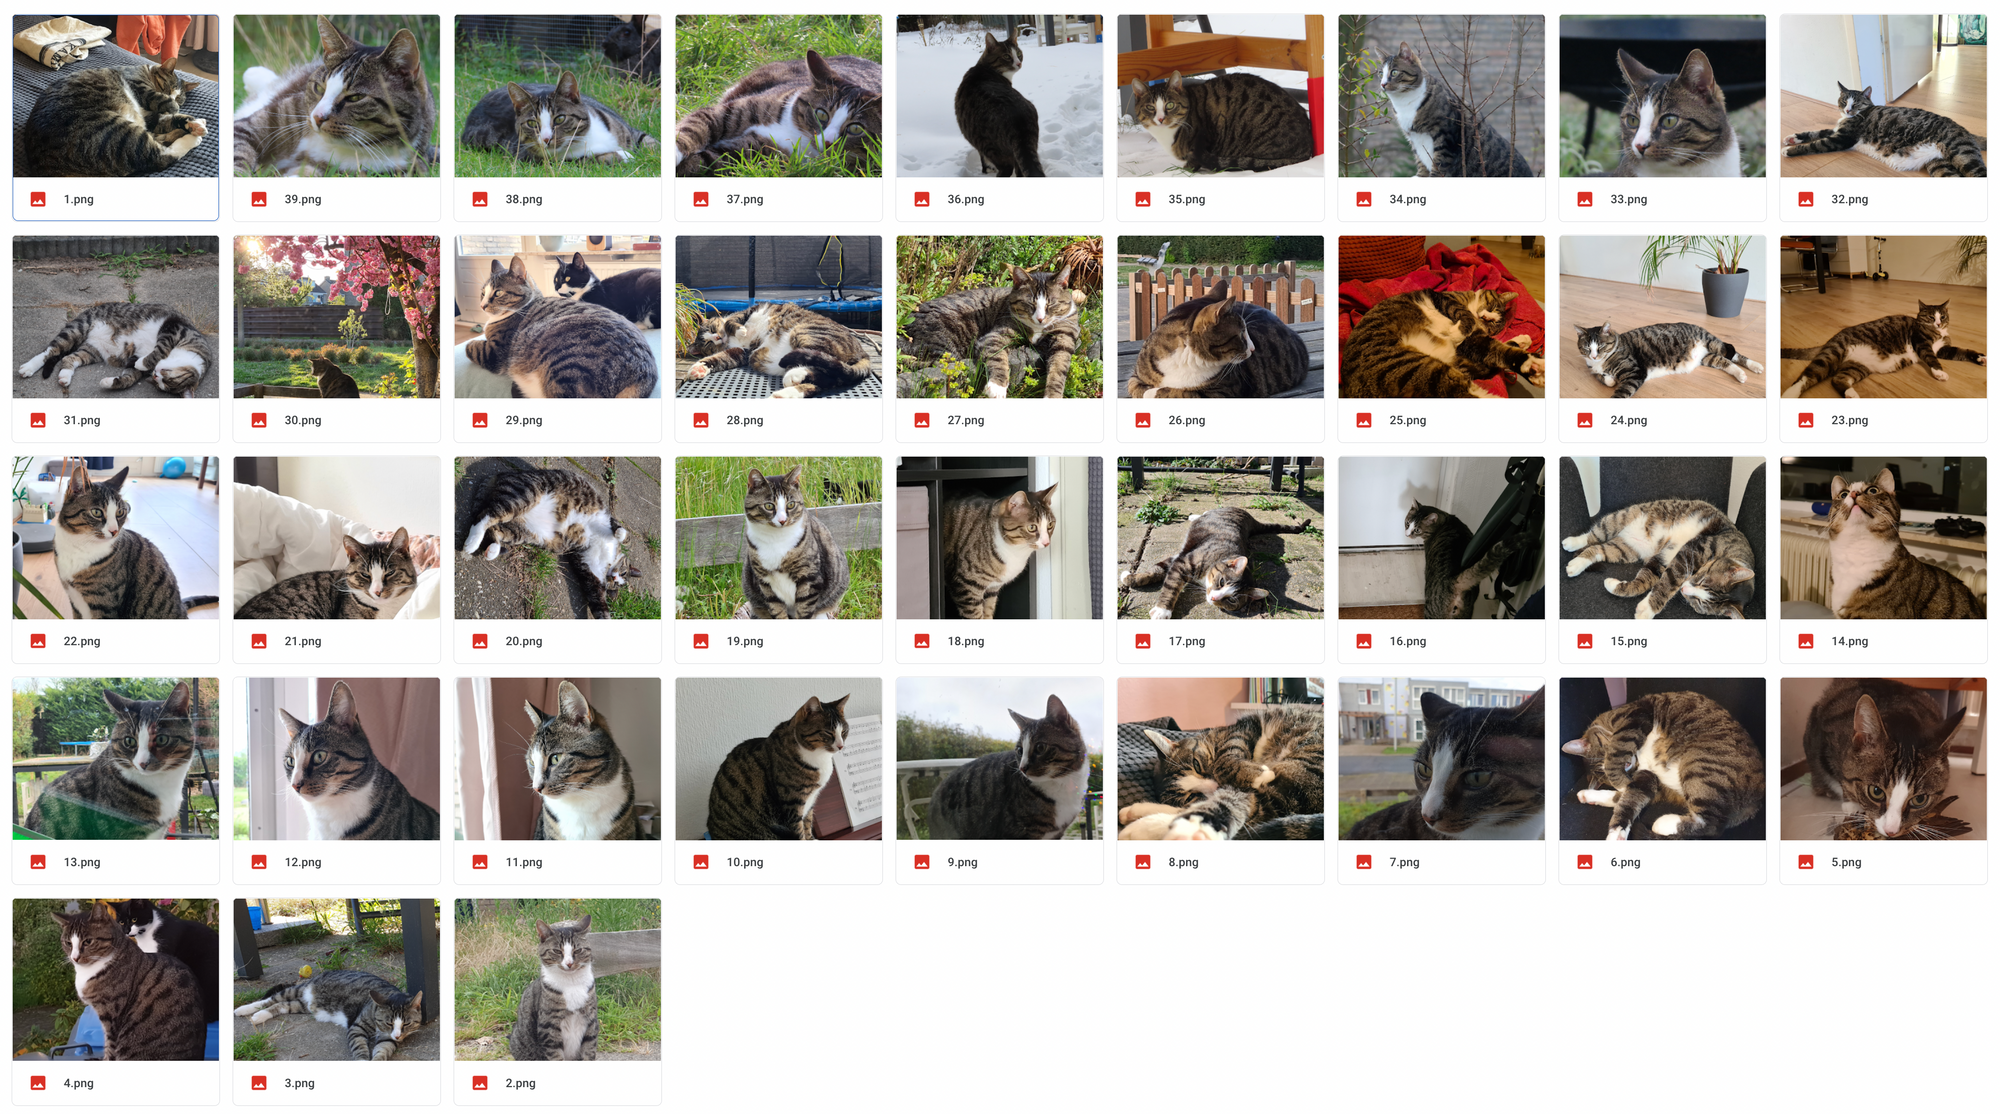
I am going to use my cat Pip as an example.
Data
First we need some data. In the Github repository they recommend collecting 200 or more pictures as training data, but good results can be achieved with a lot less.
As preparation I collected 39 pictures of my cat. All pictures need to have the dimensions of 512 x 512, because that is the format stable diffusion is trained on. I use https://pixlr.com/ to resize and crop the images.
All the resized images go into a folder in my Google Drive.
After all the images are prepared and uploaded we can start the colab notebook. Make sure that the runtime type is set to GPU.
Training the model
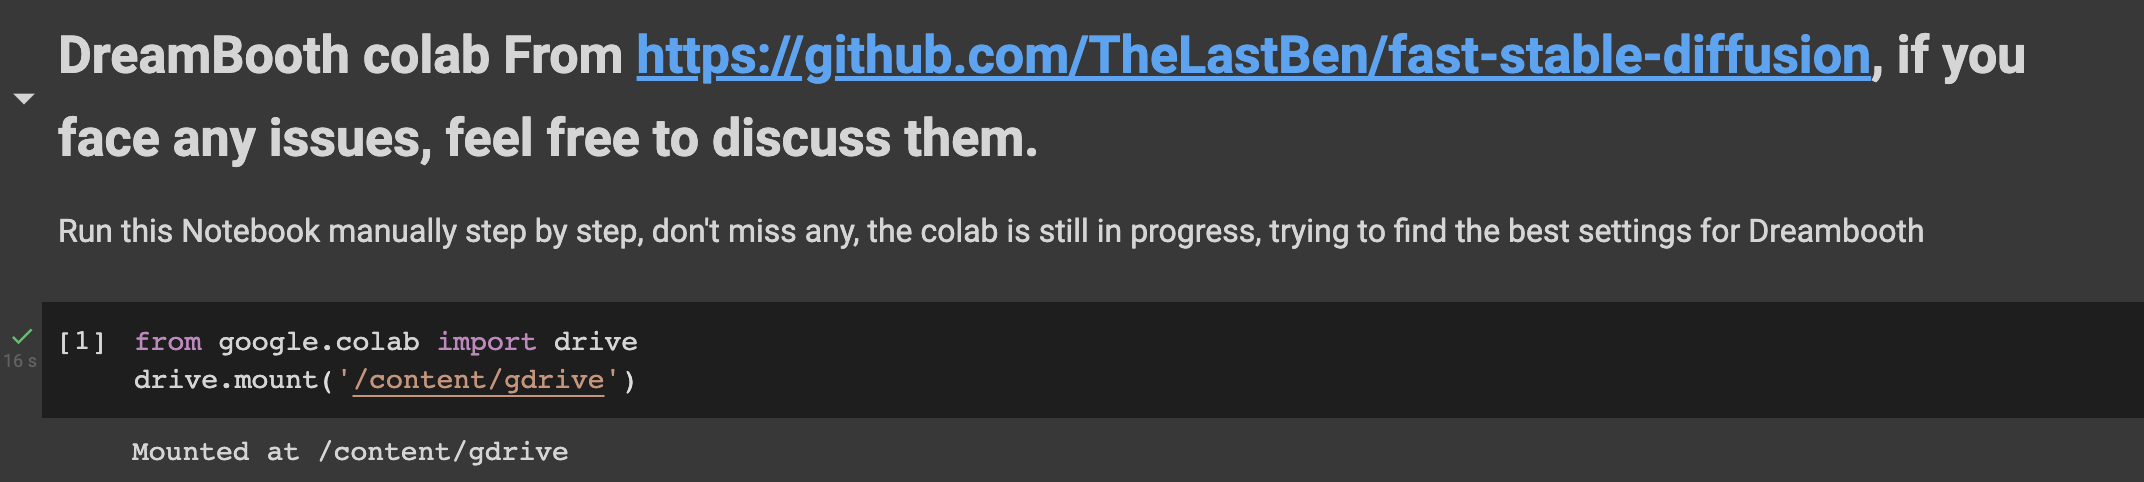
Mount google drive
The first step is to mount your Google Drive to Colab. The notebook saves the trained model to your drive. You can also use a folder from your drive for reference images used to train the model.
Setup environment & download the model
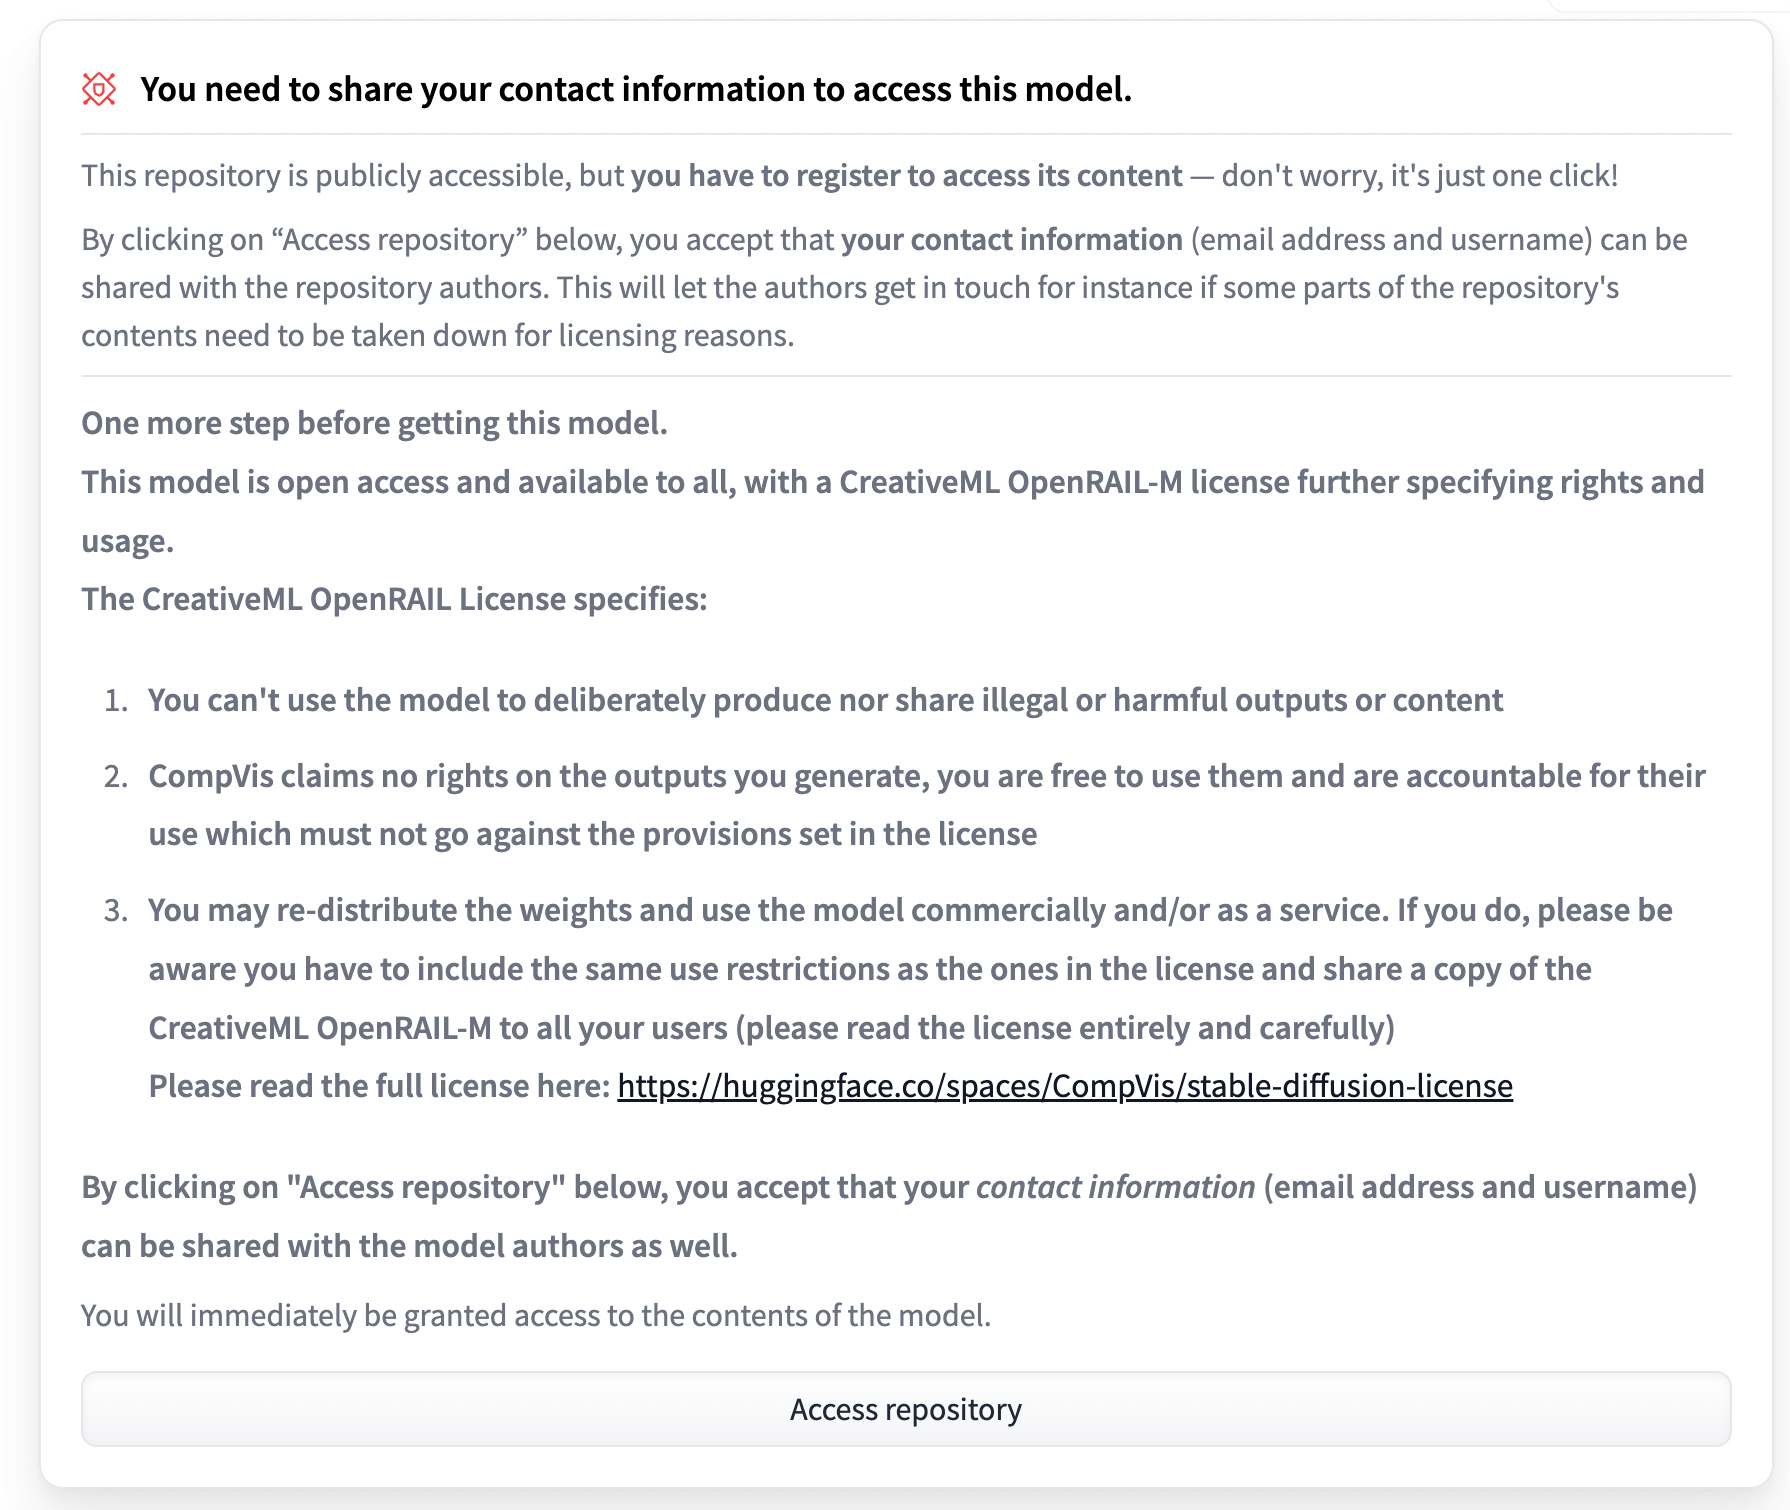
After mounting Google Drive we can setup the environment and enter our Huggingface token. Huggingface hosts the stable diffusion model here https://huggingface.co/CompVis/stable-diffusion-v1-4. You can request access to the model if you agree to some terms and conditions. To do this you need to create an account.
Dreambooth settings
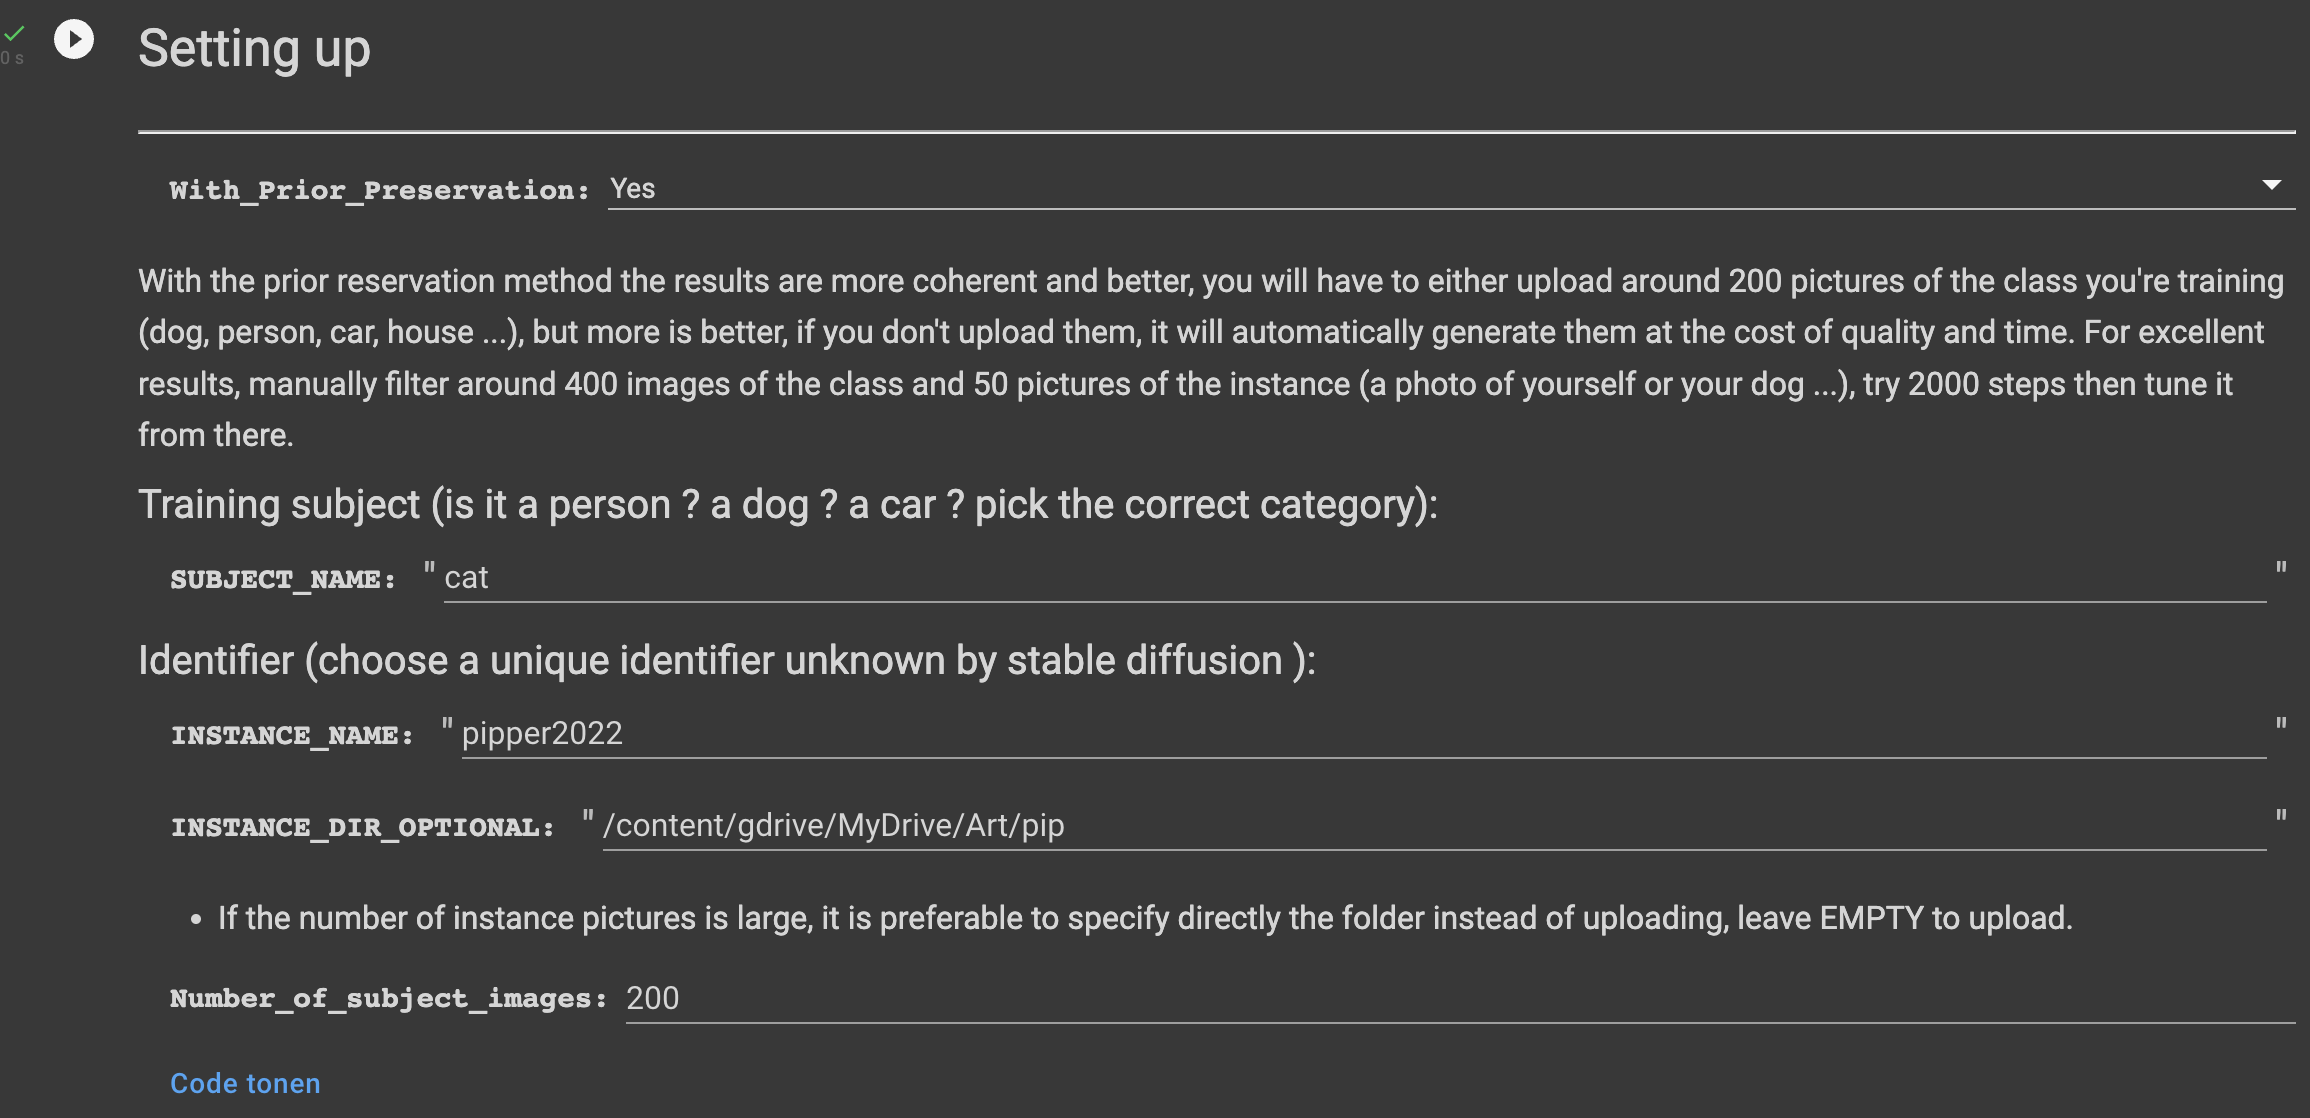
Next we have to configure Dreambooth for the model we are going to train. There are some fields we have to fill in.
SUBJECT_NAME is the class of the object we are training on. This is a coarse description of the category our training subject belongs to. It could be something like "person", "car", "house" etc. In my case I can enter "cat" here, but if you want to train the model on your own face for example you might enter "face". Dreambooth uses this to entangle your instance with the subject. The result is that less training time is needed, because the base model already knows a lot about your subject if it is general enough. Stable diffusion has seen all the poses cats can take.
INSTANCE_NAME is how we are going to refer to the subject. It is good to have a unique description here, that does not have a lot of associations with it. If we pick a word that already has a lot of associations the finetuning process has to override all those associations. I chose "pipper2022", but maybe a completely random string like "2Np1Pu6EB3" would work even better.
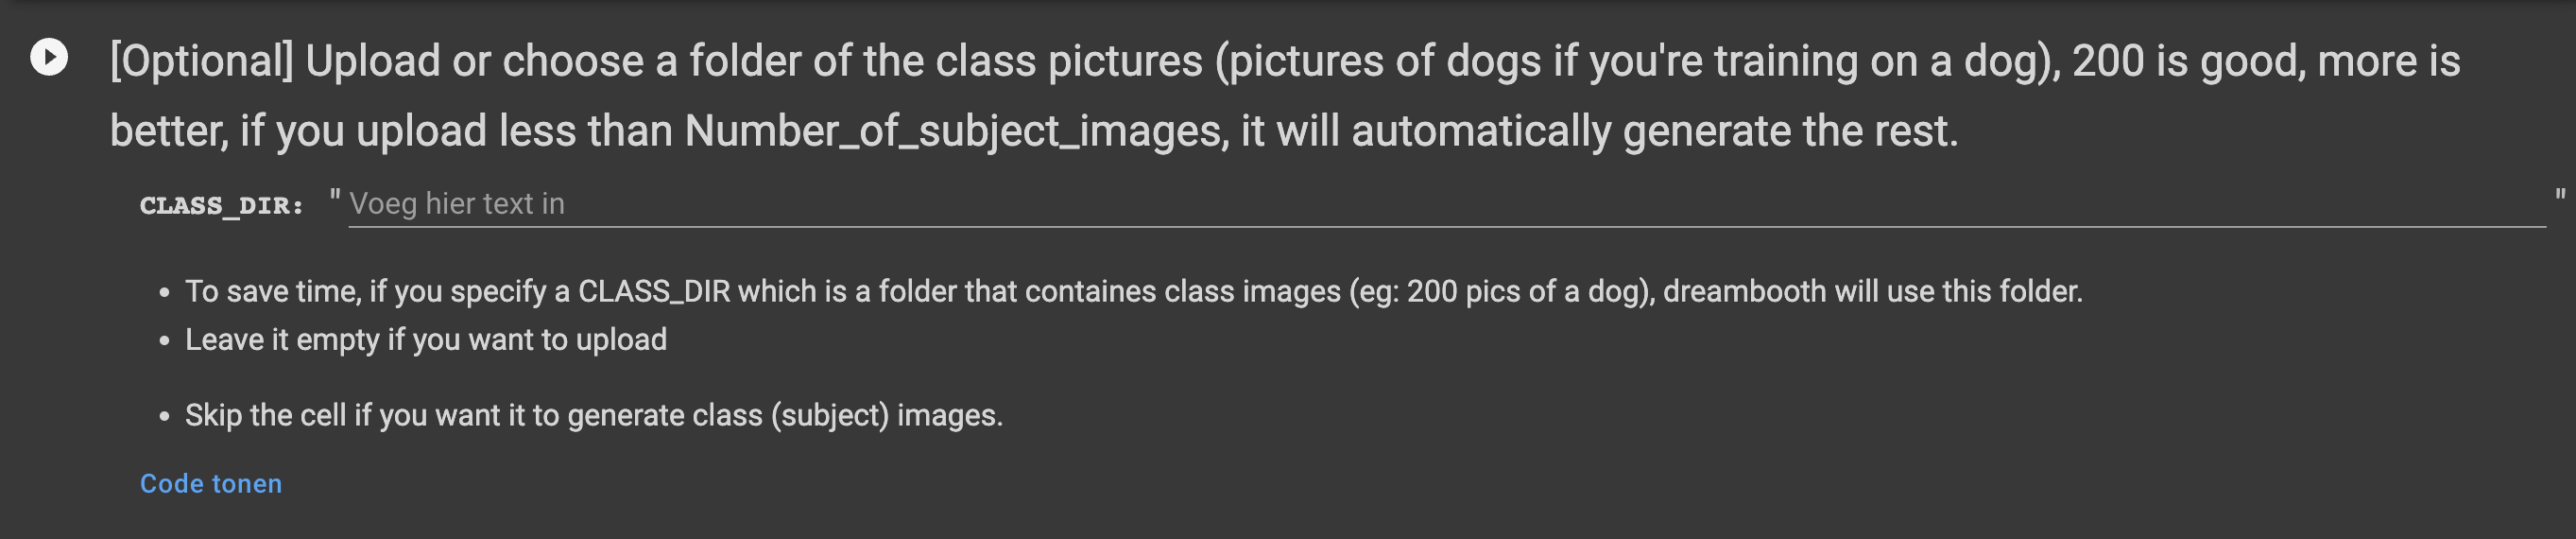
INSTANCE_DIR_OPTIONAL here I am going to refer to my Google Drive folder containing all the images of my cat Pip. It is not necessary to refer to a folder. If you leave this field empty you can upload the files directly in colab.
Number_of_subject_images here you can enter the number of subject images. These are images of your general class, so in my case images of cats. If you don't want to supply your own images they will be generated using stable diffusion, by using SUBJECT_NAME as a prompt. Some prompts generate low quality images, so if you want better quality you can choose to upload your own class images.
Subject images
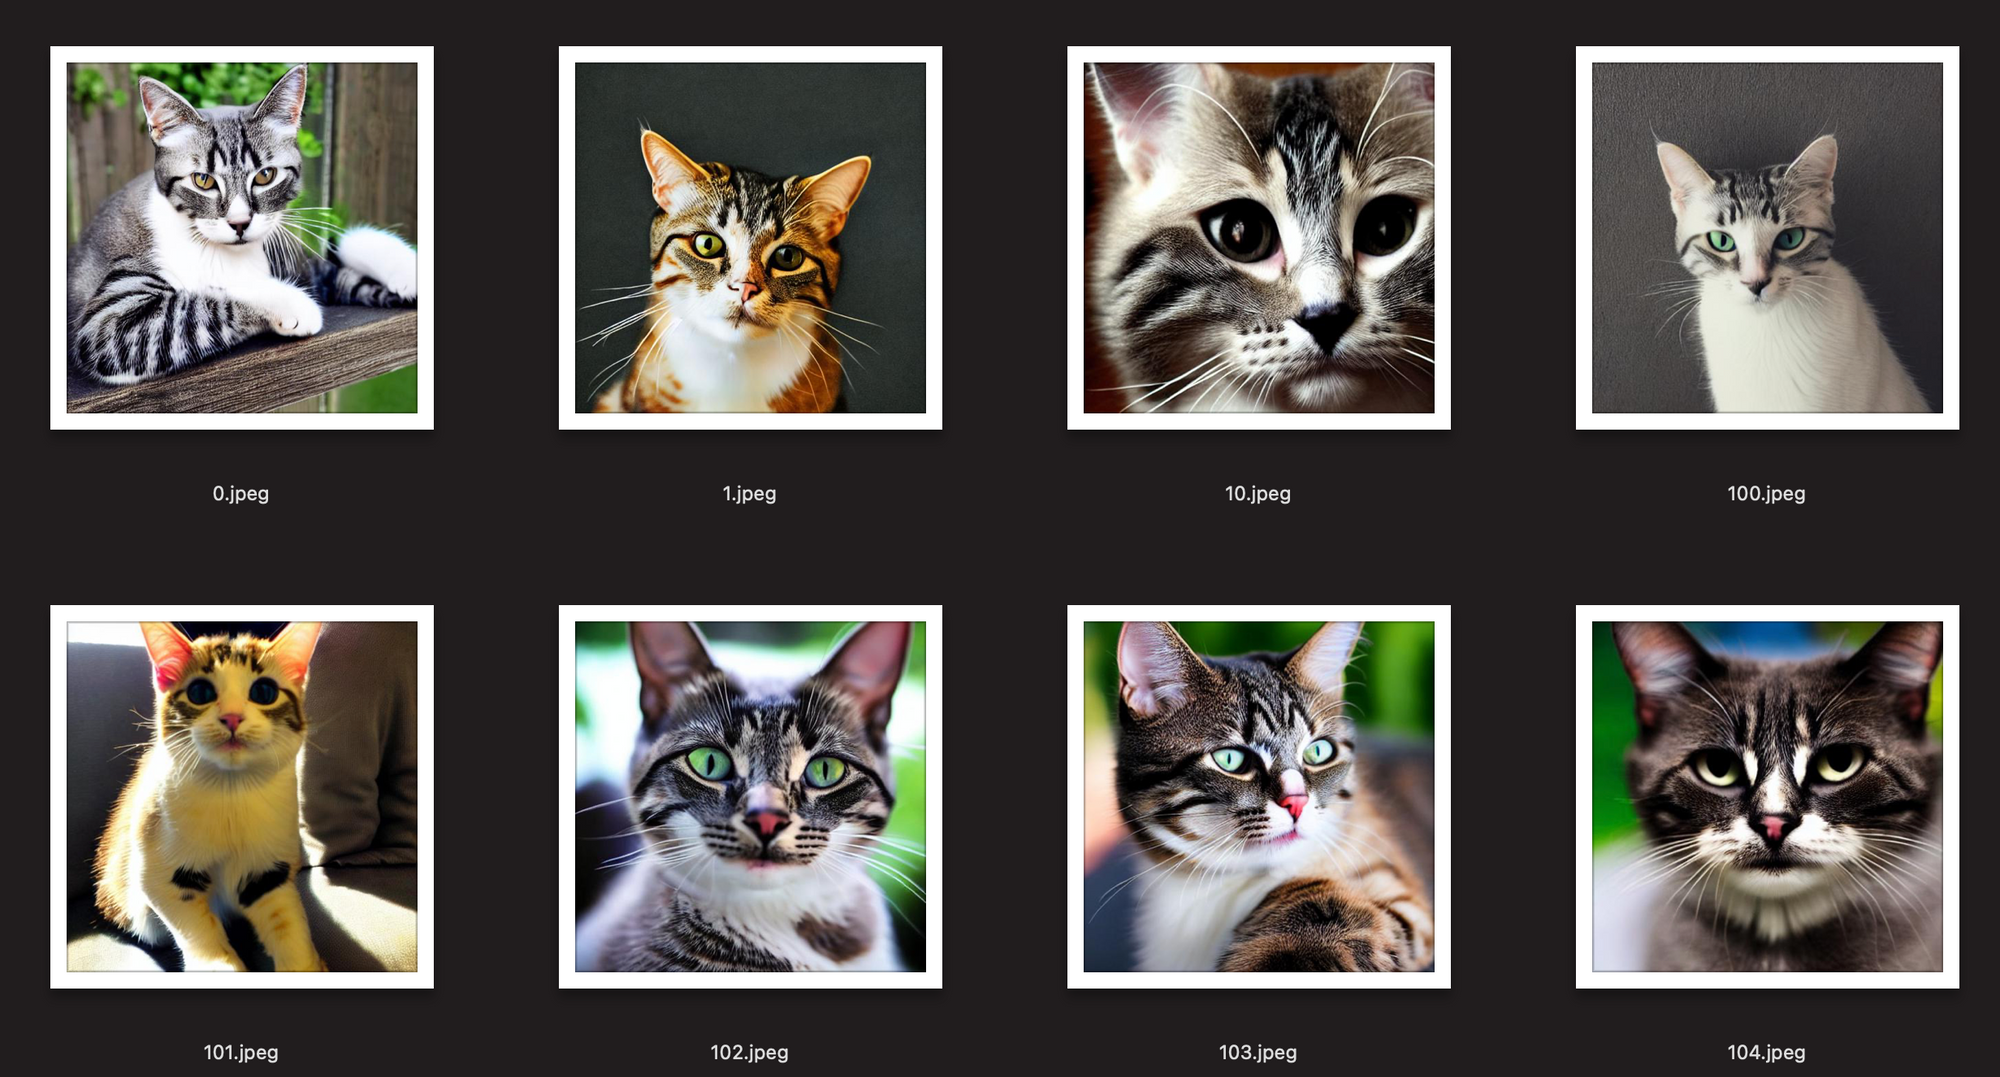
For the next step we can indicate a folder with subject images. These are images containing the category of our training subject. In my case these should be images of random cats. For this blogpost I chose not to supply my own cat images, since stable diffusion did quite a good job generating them for me.
Below are some examples of the cats generated by the notebook using the prompt "cat".
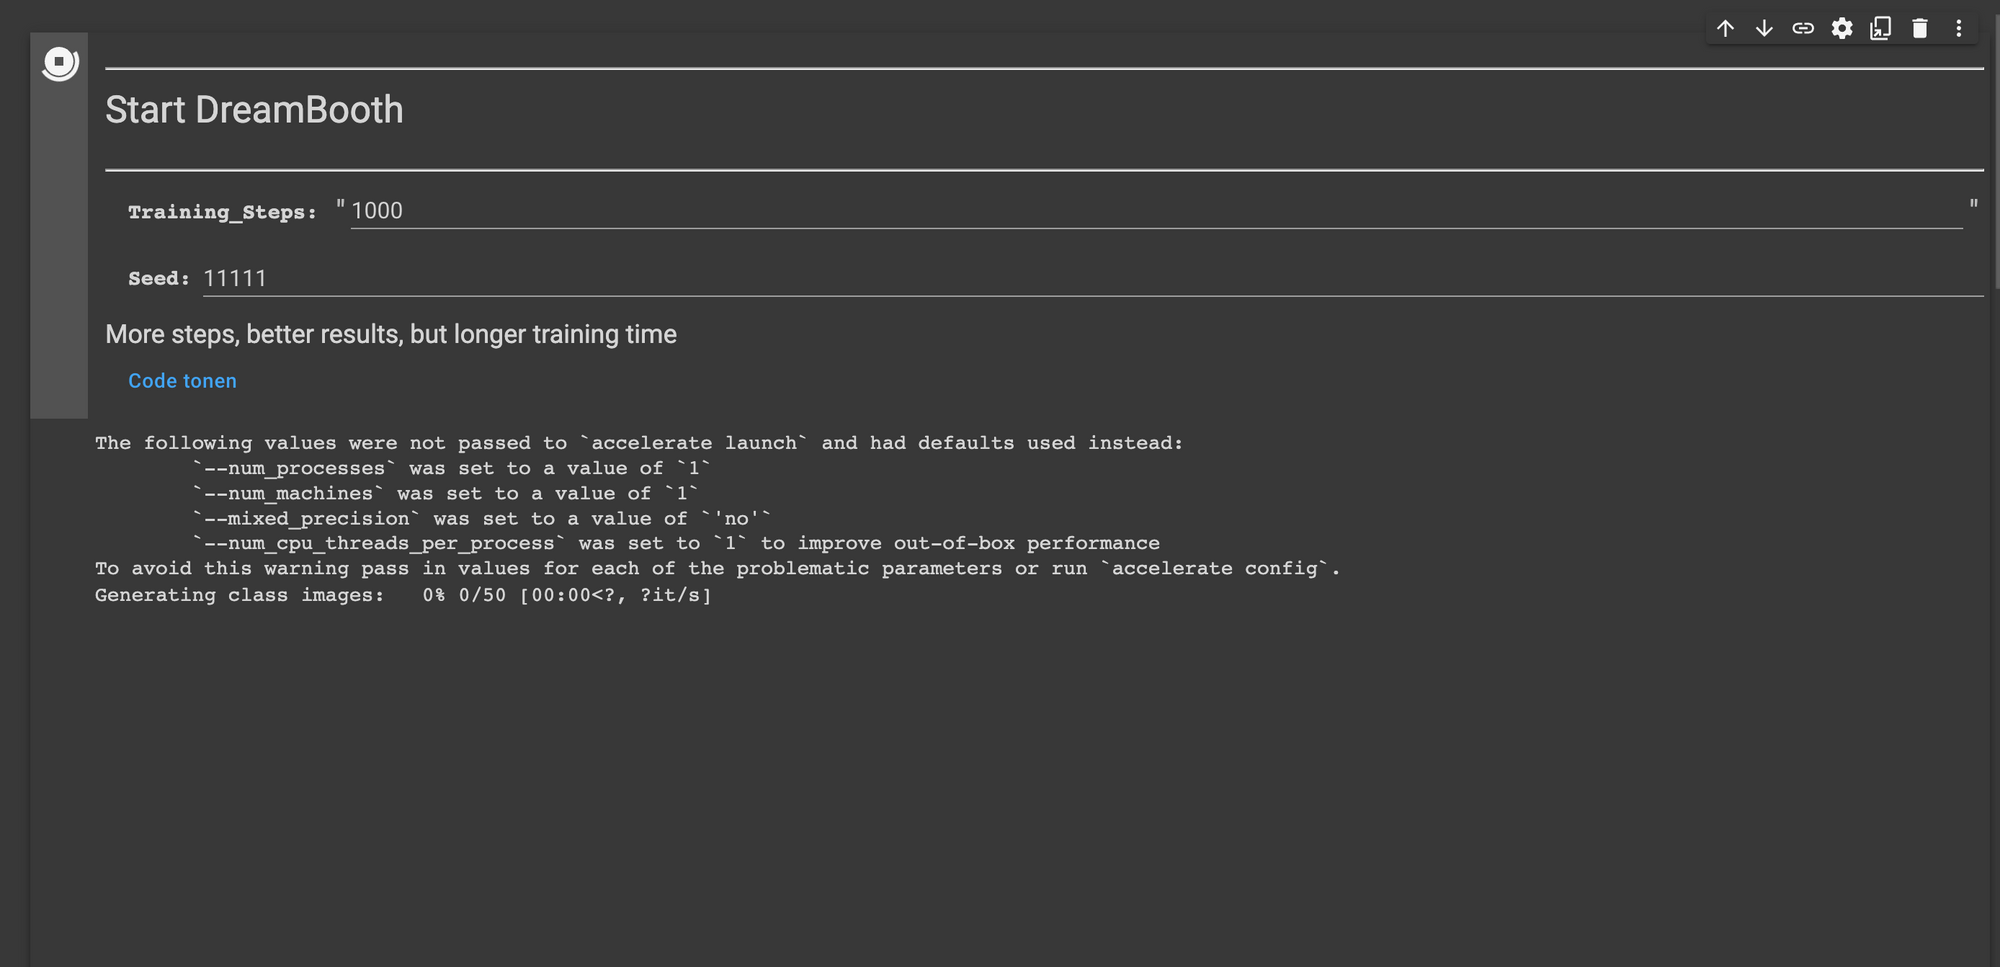
Training the model
Then it is time to train the model. The author of the Colab notebook recommends 2000 steps. How many steps you need really depends a lot on the complexity of the subject it seems. I found that for my cat 1000 steps and 40 images is sufficient. Some people get great results with few training samples and steps, but if you want to capture a person in different angles and distances you would probably need more.
Roope Rainisto did a great series of images of Grace Kelly, where he used 10.000 training steps according to one of the follow up tweets. But the drawback might be overfitting that leads to every person looking like your subject.
Grace Kelly in Game Of Thrones
— Roope Rainisto (@rainisto) October 6, 2022
Grace Kelly in Wonder Woman
Grace Kelly in Captain Marvel
Grace Kelly in Star Trek#dreambooth #stablediffusion pic.twitter.com/si5YBfUTnB
If you didn't supply subject images these will be generated before training the model. Generating the images and training the model will take time, so you can get a cup of coffee while you wait for the results.
The generated class images are saved to the data folder in your "content/data" folder, so you can check if the generated images represent your class well.
Because this is a test model I set the number of training steps to 1000 and let it run. Generating the 200 class images takes a bit more than 20 minutes and training the model for 1000 steps takes around 25 minutes on Colab Pro.
Update 2022-10-30: TheLastBen dreambooth implementation is updated. You only need to upload around 30 images, and no class images are needed anymore. This greatly reduces the amount of preparation required. Recommended steps is 100x the number of training images uploaded.
Generating images
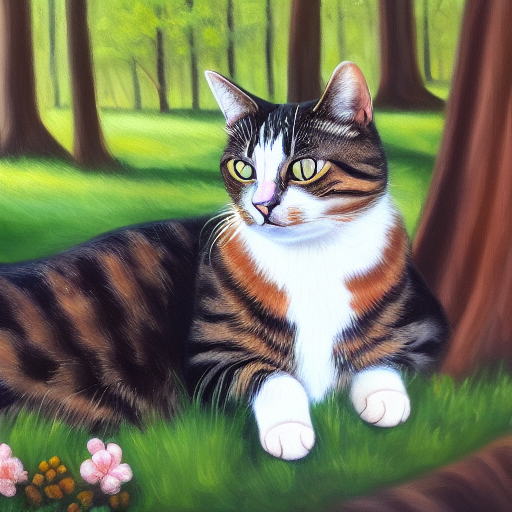
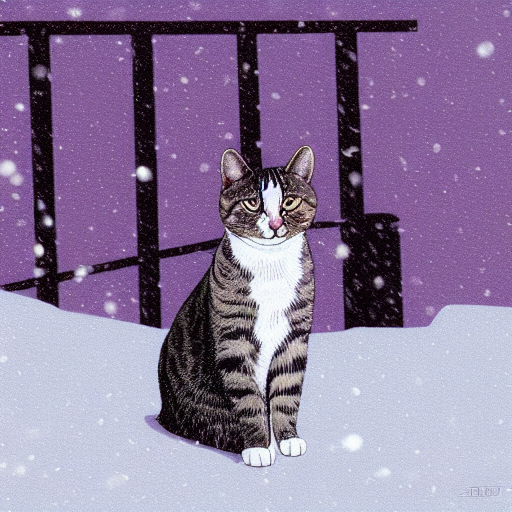
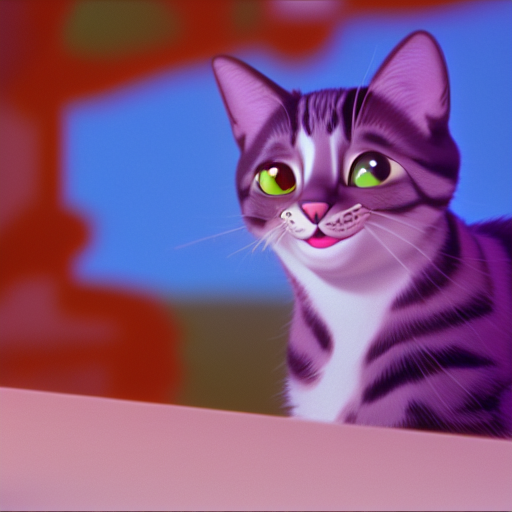
Now we trained the model we should be able to use it to transport my cat Pip to various settings. Running the last segment will start a local server for stable diffusion web-ui. For me the local server didn't work, so I used the Gradio server.
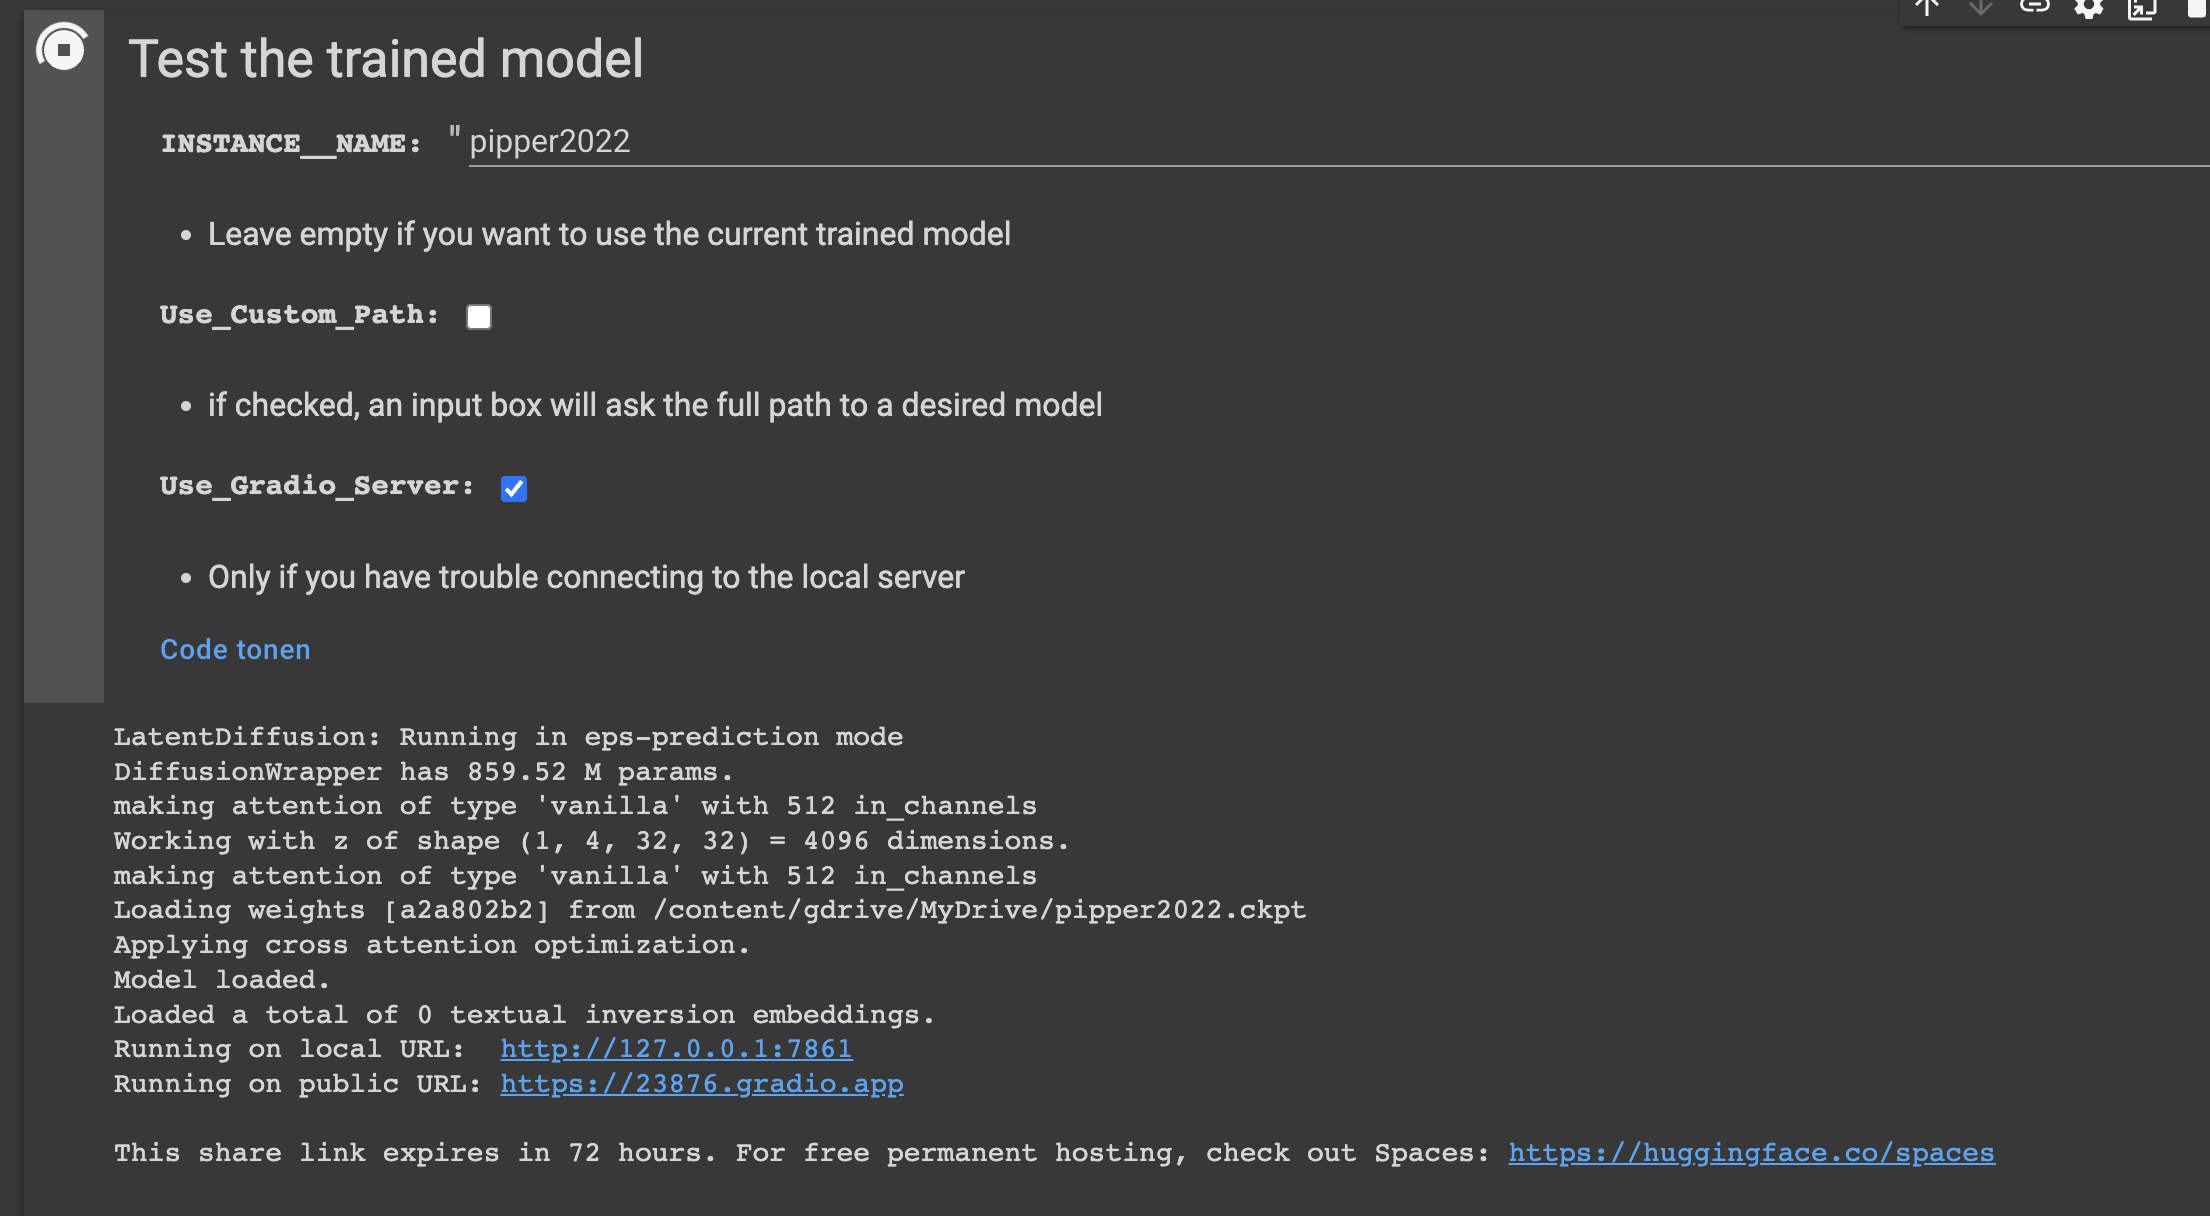
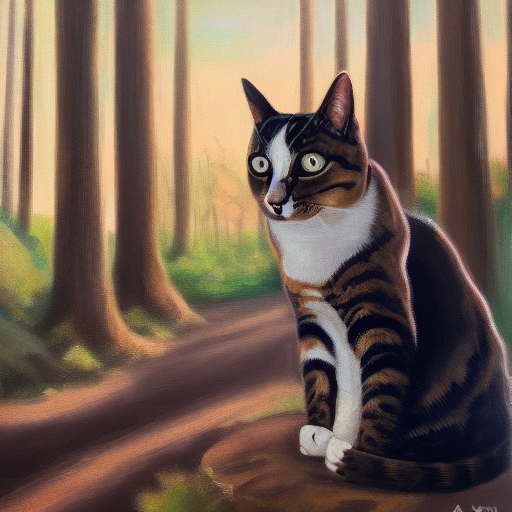
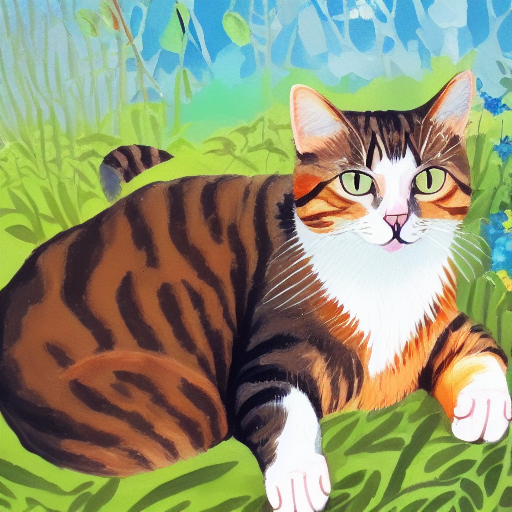
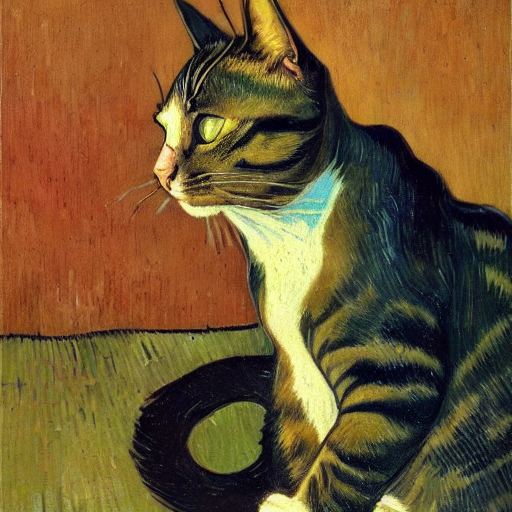
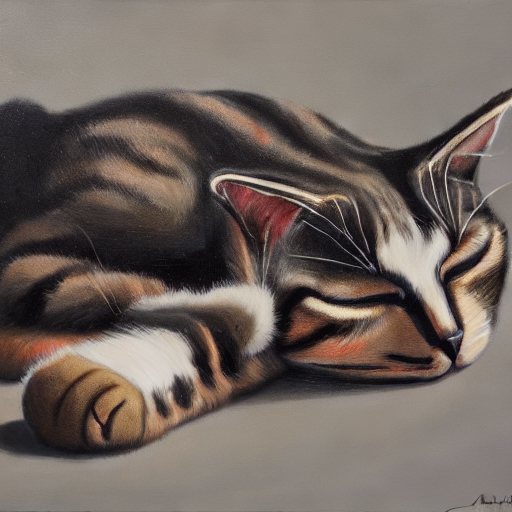
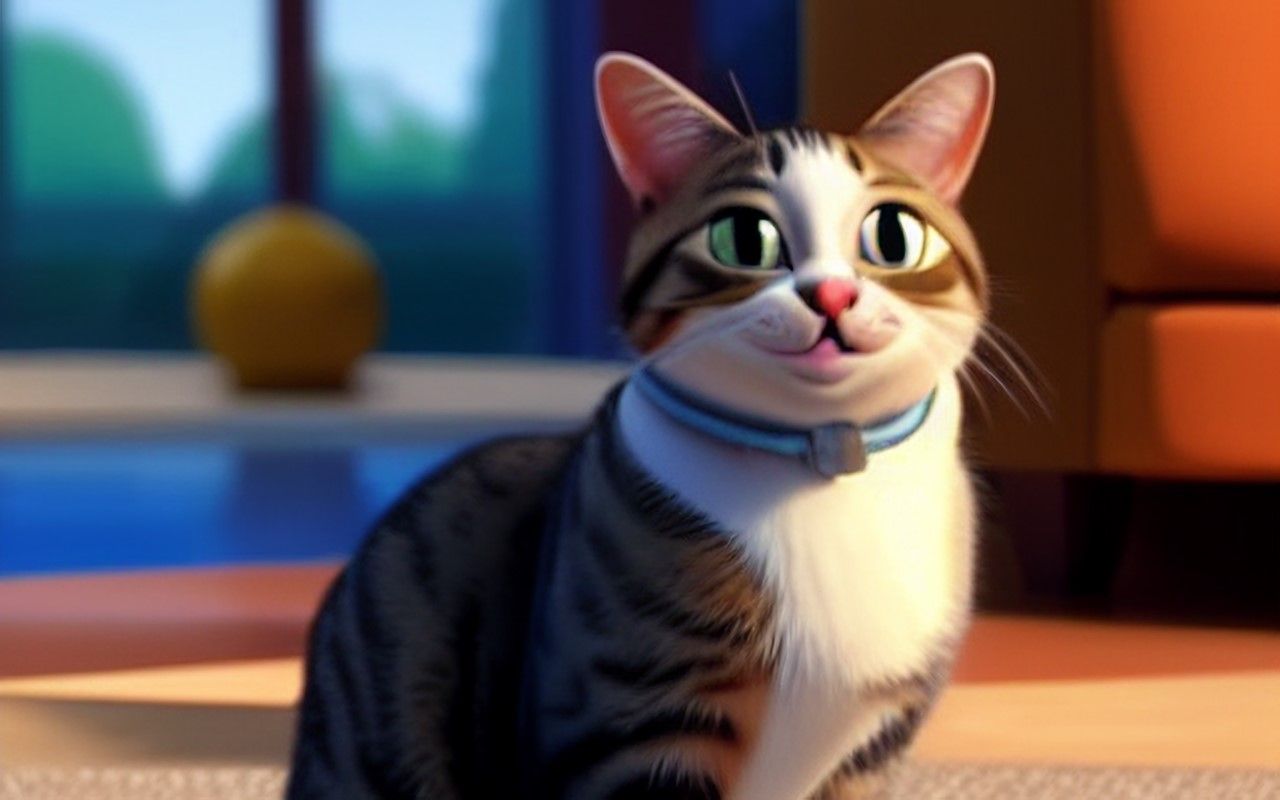
We can now open the web-ui and use the SUBJECT_NAME (cat) and the INSTANCE_NAME (pipper2022) to generate images. In the example below I tried to make an oil painting of Pip, using the name of a made up artist called "Arthur Valin".
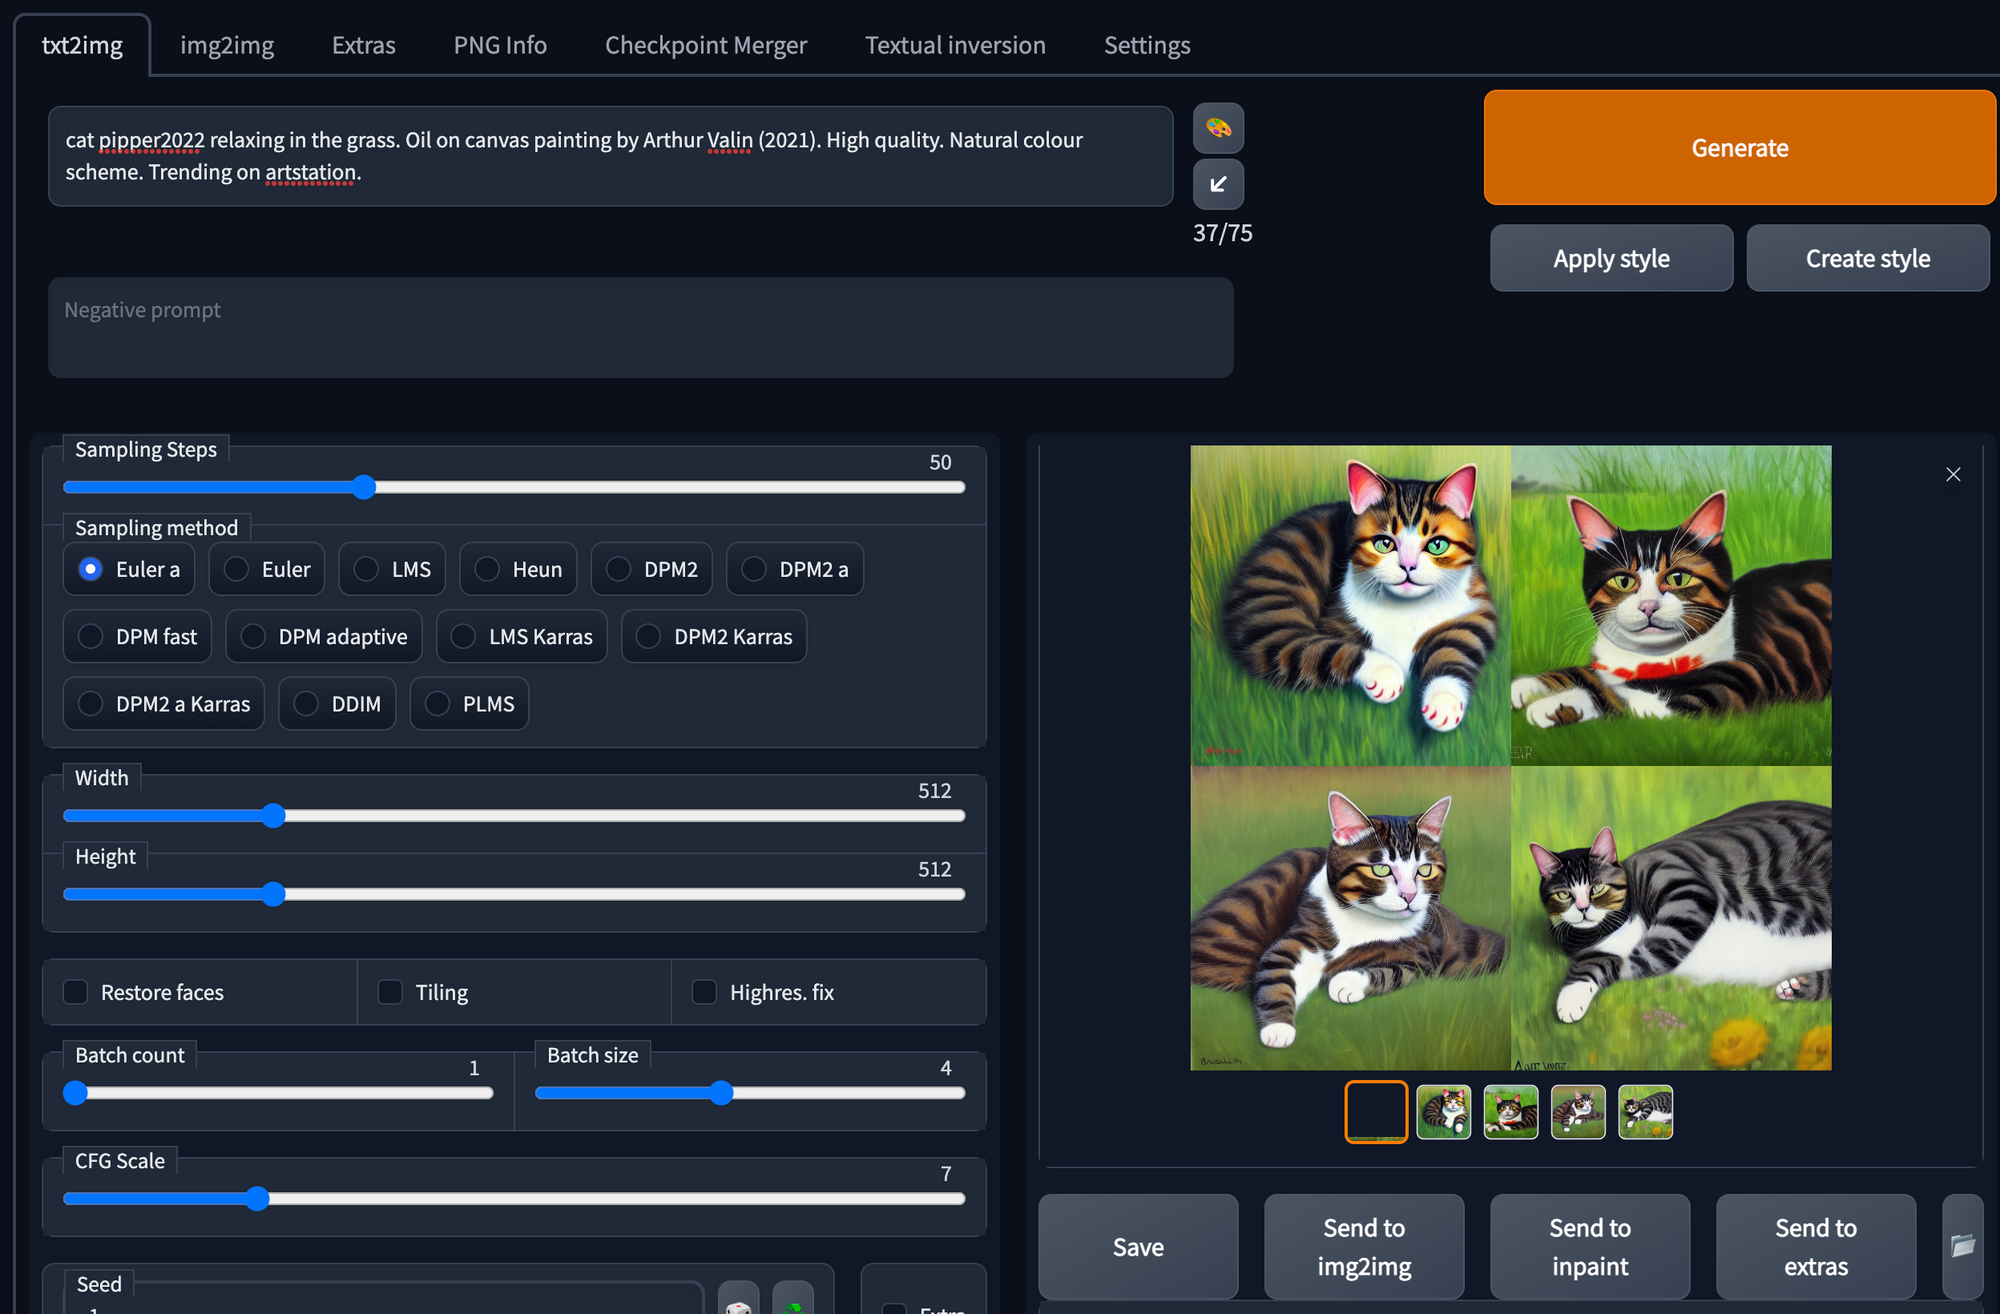
Here are some of the best Pips to come out of the process.